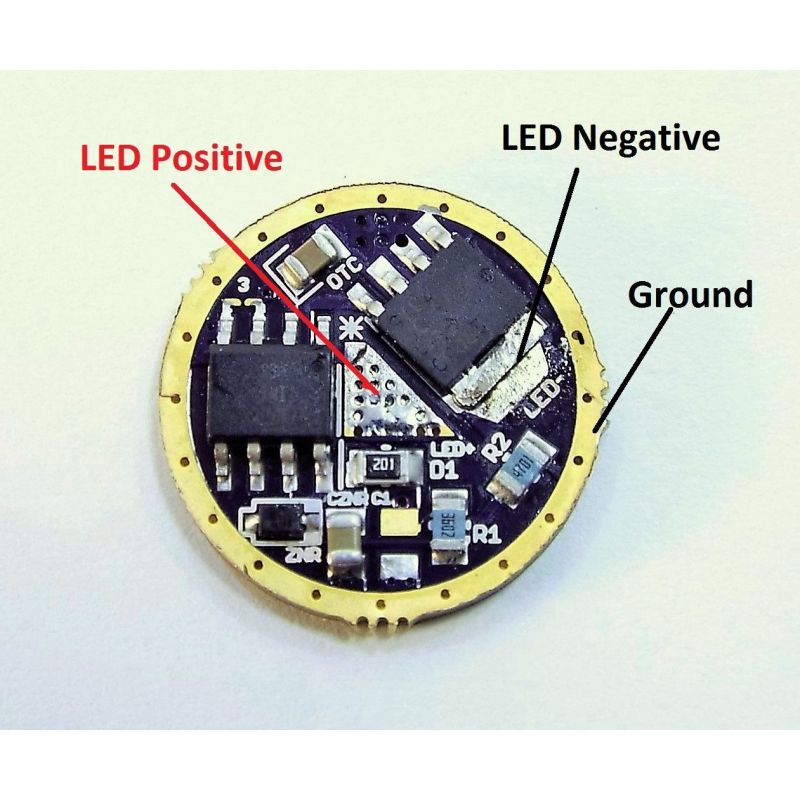


Capable of over 10 amps of power
User selectable mode groups
3-16V configurable
For use with Cree XML2, XHP50, XHP70 and more
Single or multi LED
PLEASE READ FULL DESCRIPTION FOR DIRECTIONS BEFORE PURCHASING. You must know what you are doing to use this driver correctly.
The most powerful LED driver on the market today! This tiny versatile little board packs more punch pound for pound than any driver its size, and offers ULTIMATE output flexibility.
Used for some time in Adventure Sports own products it's now available for the DIY user. This board is capable of both very low output and very high. How high depends entirely on what batteries and LED emitters are used.
This board is linear which basically means direct drive. It can be configured for use with either a single 3.7 li-ion cell ( or 3 nimh) or for multiple li-ion cells.
How it works.
For use with 3V LEDs: For Cree XML2, XPG2 or similar choose the 3V option. Any number of emitters can then be wired in parallel and run from one 3.7V IMR li-ion battery such as 18650 or 26650.
For use with 6V LEDs: For Cree XHP50, XHP70 or MTG2 choose the zener modded 6V driver option. Then a single emitter or multiple emitters can be wired in parallel and powered from 2x IMR li-ion cells such as 18650 or 26650.
Optional use for the 6V driver: You can also choose this driver and create LED configurations in higher voltage. Such as 3 XML2 wired in series, or multiple XHP emitters as long as your battery voltage is equal.
Examples would be three XML2 driven by 3x 3.7V lion. Two x XHP70s in series driven by 4 li-ion.
REMEMBER This driver is NOT a buck. You can NOT power an emitter with any more voltage using this than you would in a direct drive situation with no circuit board. Putting Two 3.7V 18650s behind one XML2 WILL KILL YOUR LED.
Other factors: This driver is well able to be used in high output setups. It has been tested here at Adventure Sport in excess of 125 watts. However to accomplish this you must have proper heat sinking for the LEDs, and the driver. In addition your batteries must be able to carry the heavy load. If you need help choosing a proper set up please feel free to ask before you purchase.
Purchase options: If you choose the 3V option it will come with LVP ( low voltage protection) for one li-ion cell. Choosing the 6V option will also give you LVP for 2 li-ion cells. You can use this option for higher voltage setups as described above, you just wont have the LVP for a greater number of cells.
Drivers are shipped fully assembled and programmed. Additional purchase options include wire leads and battery positive spring. These can be purchased with the driver, but will not come attached.
USER INTERFACE:
None other than Dr.Jones Guppy2drv. The ultimate in flexibility. This UI offers a wide range of modes to choose from. Something for almost any occasion.
User Selectable Groups:
Guppydrv Instructions
To switch mode groups: rapidly tap the switch 8 times, the light will then enter the programming mode and begin to flash. With the light in programming mode, tap the switch the same number of times as your desired mode group. The light will blink and your mode group will be memorized.
Example: To select mode group 3, tap the switch 8 times quickly to enter programming mode. As soon as the light enters programming mode and beings flashing, tap the switch three times. The light will blink to recognize the mode group change.
To set the turbo timer: rapidly tap the switch 8 times, the light will then enter the programming mode and begin to flash. With the light in programming mode, tap the switch 30 times to enter the turbo timer set mode. The light will then switch to 100% power. When the light is at the desired temperature for the turbo step down, turn the light off. The turbo timer will then be set. The turbo timer steps the light down to 50% regardless of the mode group set.
To disable the turbo timer simply go into program and cut it off in >3 seconds.
The mode group can also be locked by soldering the bridge show in picture 2.
Here is a short video on how this UI works.
https://www.youtube.com/watch?v=_ug0I8cDFOM
Please Note: Using this diver with li-ion or any batteries carries risk. Building high powered electrical setups has potential to cause fire, eye injury, burning of skin and other. Adventure Sport Flashlights™ is NOT responsible for accidents or damage including but not limited to fire or personal injury resulting from use or misuse of its products. By purchasing you agree to these terms.